LlamaCPP and Falcon3 - mission possible
The library that makes Generative AI reality even for Poor GPU guys. And learn how to run the new Falcon3 models on your local PC.

Llama.CPP is an amazing library: with 50 Mb of code you can basically run on your PC very performing AI models.
In this newsletter, special Xtmas gift, I will teach you how to run the latest Falcon3-1B-instruct on your PC.
According to the official benchmarks the base model Falcon3 beats even Gemma2-2B. But well, since I don’t trust these figures, the only way to find it out is to do it yourself.
This week I am anticipating the newsletter: we are almost at Xtmas time, so I want you to enjoy my GIFTs.
Here you go!
Meet llama.cpp
Georgi Gerganov’s llama.cpp is a project that ports Facebook’s LLaMA model to C/C++ for running on personal computers. LLaMA, short for “Large Language Model for AI”, is a large language model developed by Facebook AI Research, known for its capabilities in text generation, translation, and code generation.
Here’s what makes Gerganov’s llama.cpp project unique:
Portable and efficient: C++ makes the model executable on a wider range of devices, potentially even smartphones, compared to pre-built binaries.
Customization potential: By accessing the source code, users can adapt and optimize the model for specific tasks or hardware.
Transparency and learning: Working with the C++ code provides deeper insights into how the model functions and its inner workings.
The fast way to run Llama.CPP
For months I have done the wrong things. But llama.cpp now has pre-compiled binaries at every release. So, for instance, starting from revision b4351 llama.cpp supports also the Falcon3 models.
To be inclusive (all kind of hardware) we will use the binaries for AXV2 support, from release b4358 (the one available at the time of this newsletter writing).
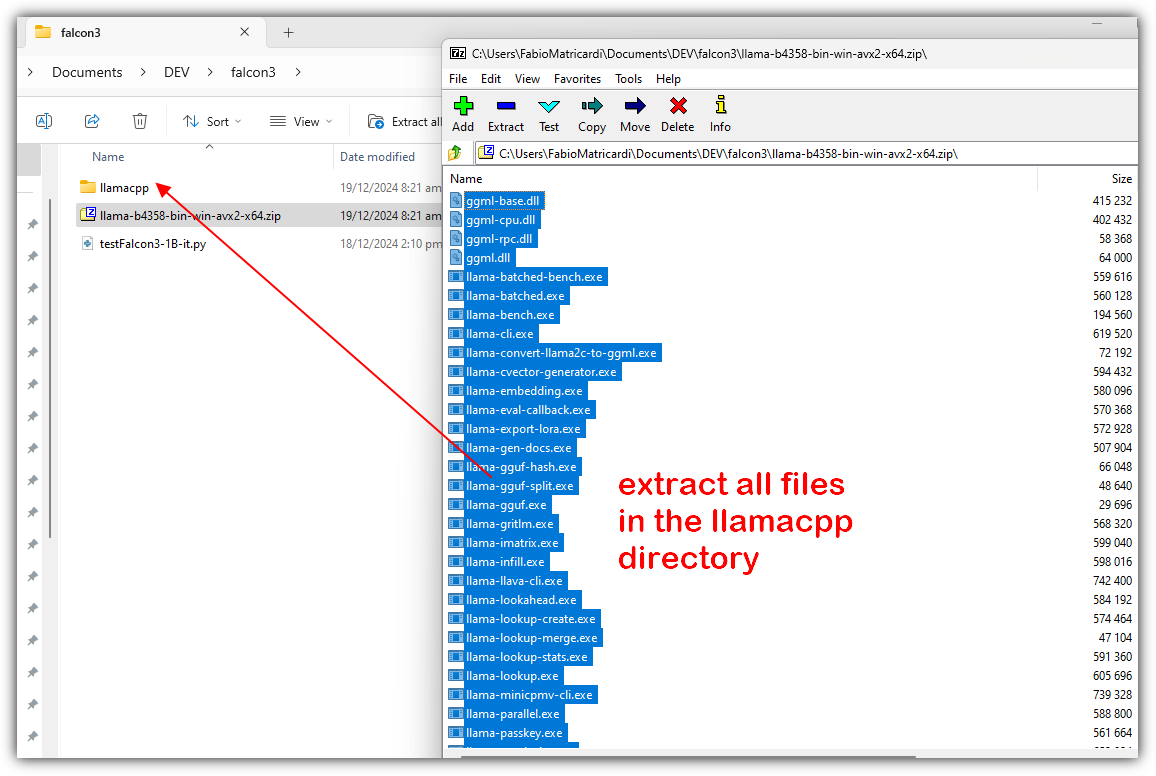
Download the file in your project directory: for me is Falcon3. Create a sub-folder called llamacpp and inside another one called model (we will download the GGF for Falcon3 there).
Unzip all files in the llama-b4358-bin-win-avx2-x64.zip archive into the llamacpp directory
Download the from the MaziyarPanahi Hugging Face repository: I used the Q6 (Falcon3-1B-Instruct.Q6_K.gguf) quantization, but also the Q8 is good. Save the GGUF file in the subdirectory llamacpp\model.
Run the model as a Server
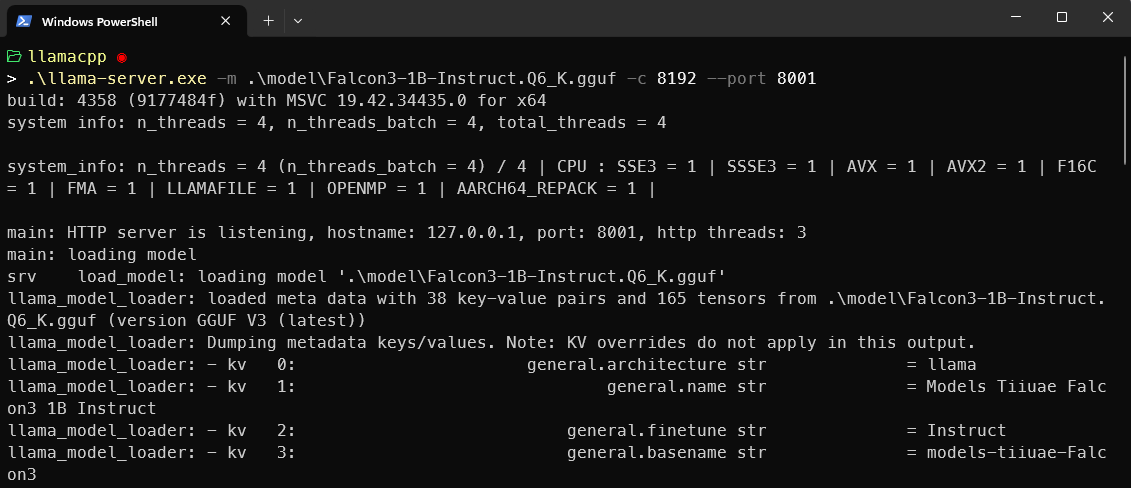
Open a terminal window in the subdirectory llamacpp, and run
.\llama-server.exe -m .\model\Falcon3-1B-Instruct.Q6_K.gguf -c 8192 --port 8001This command will start an OpenAI compatible server, completely locally on your computer, listening at port 8001
Now we will use python and build a chat application, running only in the terminal, to test this instruction model.
Run text UI python
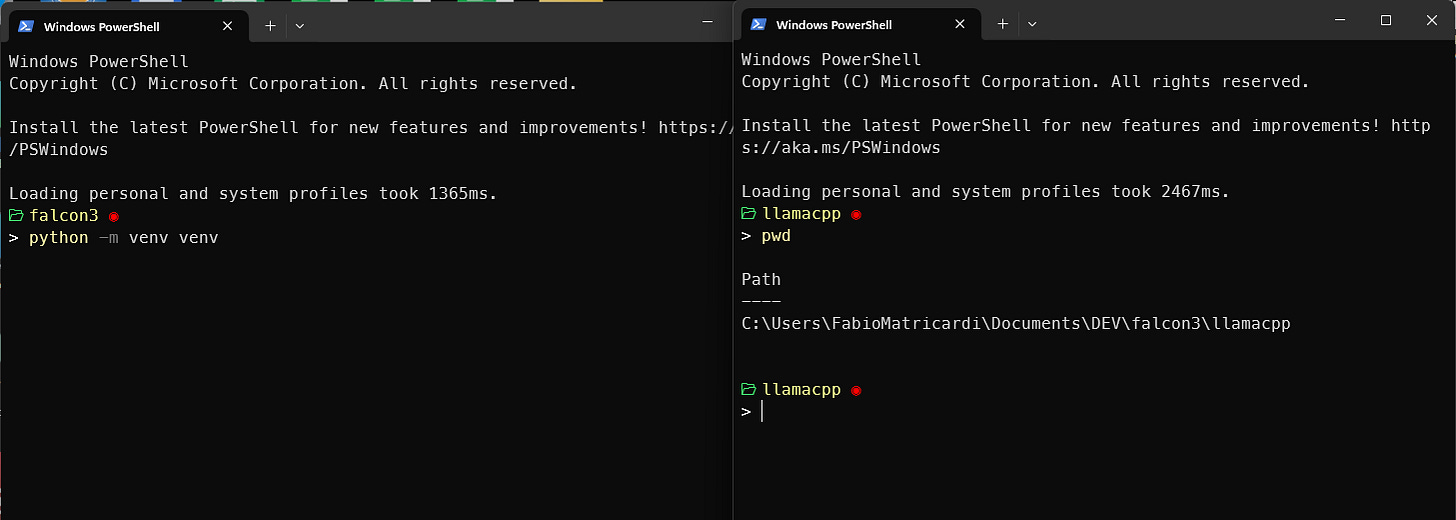
Open another terminal window inside the root project folder (for me is falcon3) and create a virtual environment
# create the virtual environment
python -m venv venv

# activate the venv (on windows)
venv\Scripts\activate
After the venv is activated, we need to install only one python package: openai. This library makes it super easy to access the API endpoints created by llama-server.
pip install openaiThe python code, for me, is in a file called testFalcon3-1B-it.py. I will explain the code step by steps, and put the entire file in a little while.
The code is also available in my GitHub repo, here.
We import the library and instantiate a client connection the API endpoint. Your server (running in the first terminal window from section Run the model as a Server…) is waiting at port 8001.
from openai import OpenAI
# Point to the local server
client = OpenAI(base_url="http://localhost:8001/v1", api_key="not-needed")
To call the completion, we call the API endpoint for the chat completion. in this example we are not streaming the output, but we wait the inference to be completed and then print it.
chatmessage= [{"role": "user", "content": "what is science?"}]
completion = client.chat.completions.create(model="local-model",
             messages=chatmessage,
             temperature=0.3,
             stop=['<|endoftext|>'])
print(completion.choices[0].message.content)
The text of the reply is nested inside the completion object, that is why we need to do all of this. If we print the completion itself, you would see something like this:
print(completion)
ChatCompletion(id='chatcmpl-WEljXVdhUr6oQVEaBSS9Qca2dsdlYpqj', choices=[Choice(finish_reason='stop', index=0, logprobs=None, message=ChatCompletionMessage(content='Science is a systematic and logical approach to discovering how the world works. It involves observing phenomena, forming hypotheses, conducting experiments, and using empirical evidence to develop theories and models. Science seeks to understand the natural world through observation, experimentation, and the formulation of testable explanations. It encompasses a wide range of disciplines, including biology, chemistry, physics, geology, astronomy, and many others, each focusing on different aspects of the universe.', refusal=None, role='assistant', audio=None, function_call=None, tool_calls=None))], created=1734569463, model='local-model', object='chat.completion', service_tier=None, system_fingerprint=None, usage=CompletionUsage(completion_tokens=87, prompt_tokens=26, total_tokens=113, completion_tokens_details=None, prompt_tokens_details=None), timings={'prompt_n': 26, 'prompt_ms': 1022.201, 'prompt_per_token_ms': 39.315423076923075, 'prompt_per_second': 25.435310667862776, 'predicted_n': 87, 'predicted_ms': 7262.335, 'predicted_per_token_ms': 83.47511494252873, 'predicted_per_second': 11.979618125575314})
The final app, inside a file called testFalcon3-1B-it.py is like the following.
from openai import OpenAI
import sys
from time import sleep

STOPS = ['<|endoftext|>']
COUNTERLIMITS = 10  #an even number

# Point to the local server
client = OpenAI(base_url="http://localhost:8001/v1", api_key="not-needed")
print("3. Ready to Chat with Falcon3-1B-instruct  Context length=8192...")
print("\033[0m")  #reset all

history = [
]
print("\033[92;1m")
counter = 1
while True:
    if counter > COUNTERLIMITS:
        history = [
        ]
    userinput = ""
    print("\033[1;30m")  #dark grey
    print("Enter your text (end input with Ctrl+D on Unix or Ctrl+Z on Windows) - type quit! to exit the chatroom:")
    print("\033[91;1m")  #red
    lines = sys.stdin.readlines()
    for line in lines:
        userinput += line + "\n"
    if "quit!" in lines[0].lower():
        print("\033[0mBYE BYE!")
        break
    history.append({"role": "user", "content": userinput})
    print("\033[92;1m")

    completion = client.chat.completions.create(
        model="local-model", # this field is currently unused
        messages=history,
        temperature=0.3,
        frequency_penalty  = 1.6,
        max_tokens = 600,
        stream=True,
        stop=STOPS
    )

    new_message = {"role": "assistant", "content": ""}

    for chunk in completion:
        if chunk.choices[0].delta.content:
            print(chunk.choices[0].delta.content, end="", flush=True)
            new_message["content"] += chunk.choices[0].delta.content
    history.append(new_message)
    counter += 1
This will stat a loop, a chat app that will exit only when you prompt quit!. I made it that it can accept multiple lines (so you can paste text here): remember to press Ctrl-Z when your prompt is complete!
To run it, with the venv activated and the llama-server still running in the other window, run:
python testFalcon3-1B-it.pyIn the GitHub repository you will find also the cool ASCII art shown in the video above 😉
As a gift of the week, see how you can use llama.cpp to do speech recognition:

This is only the start!
Hope you will find all of this useful. I am using Substack only for the newsletter. Here every week I am giving free links to my paid articles on Medium. Follow me and Read my latest articles https://medium.com/@fabio.matricardi
Check out my Substack page, if you missed some posts. And, since it is free, feel free to share it!


