


Run DeepSeek-R1 on your PC, locally
Llama.cpp and Python for a quick and esay chat interface: DeepSeek-R1-Distill-Qwen-1.5B


There is an uproar in the Generative AI community after DeepSeek-AI labs released their first-generation reasoning models, DeepSeek-R1-Zero and DeepSeek-R1. We already have so many praises but also so many criticism, that we could write an entire book.

Deepseek-R1 is a Mixture of Experts model, trained with the reflection paradigm, from the base model Deepseek-V3. It is a huge model, 671 Billion parameters in total, but only 37 Billion active during inference.
According to their release note, the 32B and 70B version of the model are on par with OpenAI-o1-mini. And here comes the real achievement (in my opinion…) of this Chinese AI-Lab: they created six other models simply training weaker base models (Qwen-2.5, Llama-3.1 and Llama-3.3) on R1-distilled data.
If you are uncertain of the meaning of this, distillation is the process where a large and more powerful model “teaches” a smaller model with synthetic data.
I always push my readers to test a model by themselves, and do not trust the official benchmarks or social media claims.
As promised last week, today we will learn how to run DeepSeek-R1-Distill-Qwen-1.5B.GGUF on your pc, all locally and for free.
The easy way
Clone my GitHub repo and follow the instructions


The Hard way
This chatbot basically use only the openai library. In fact the back-end is completely handled by llama.cpp server, running an openAI compatible API endpoint.
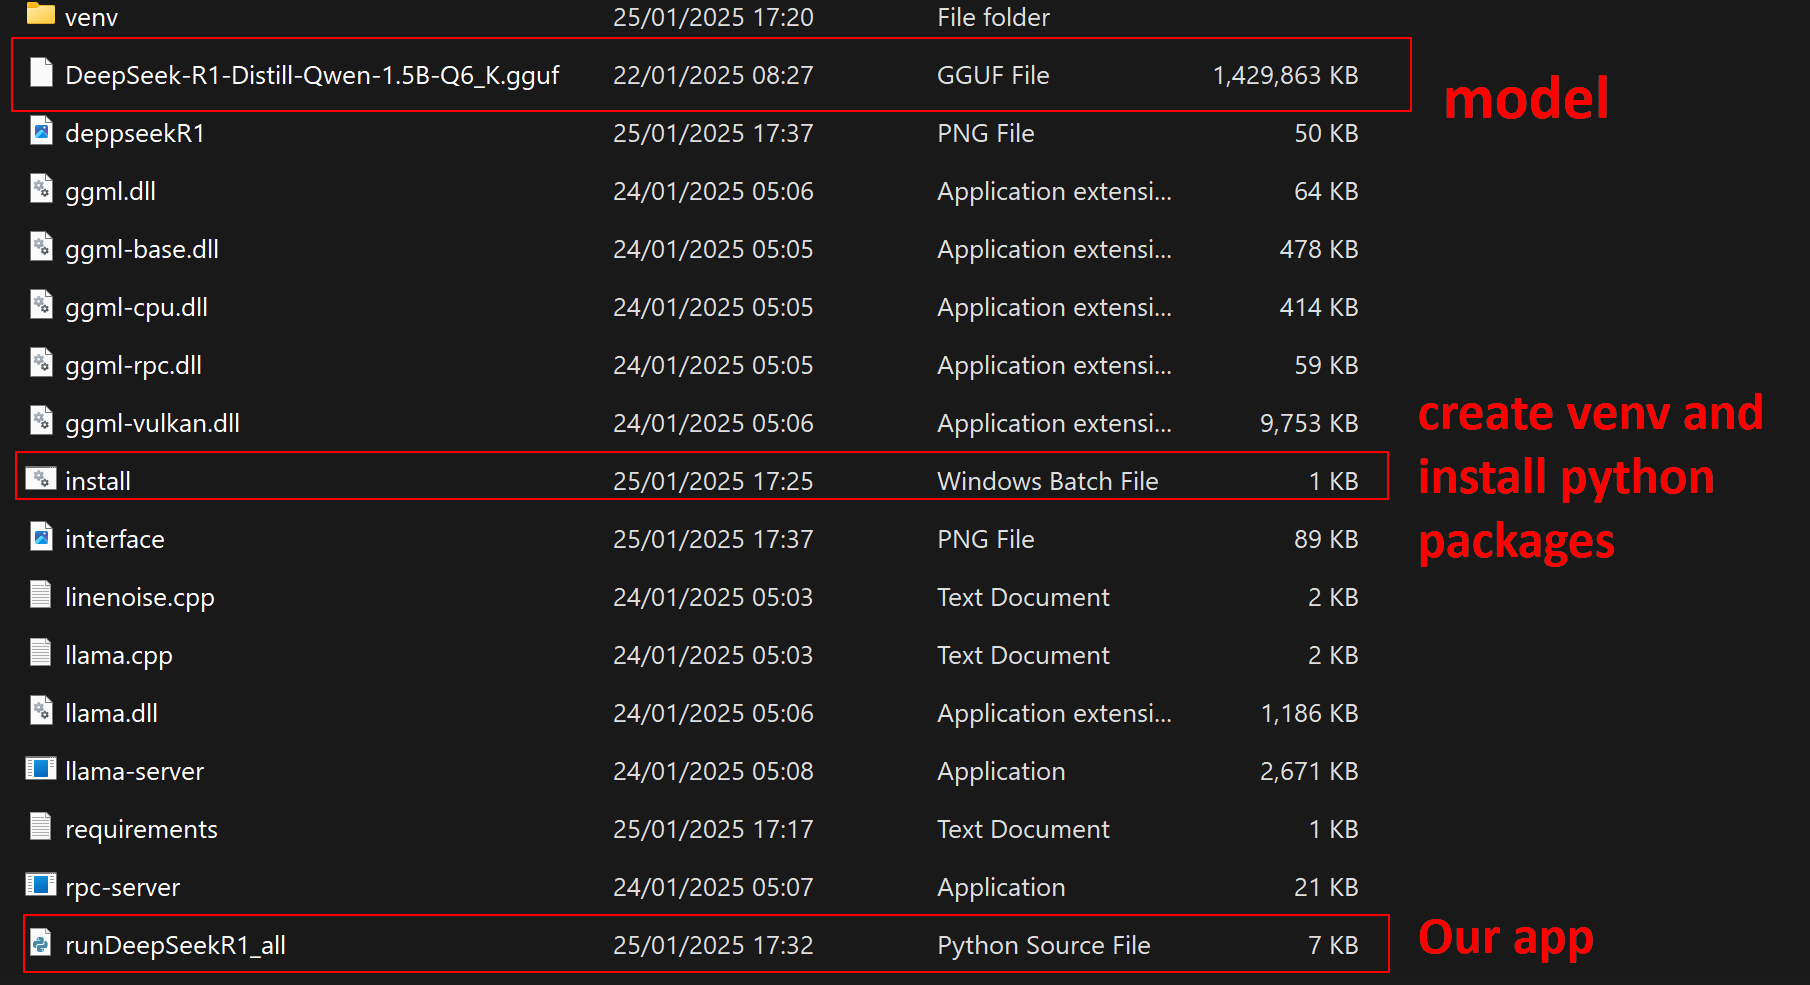
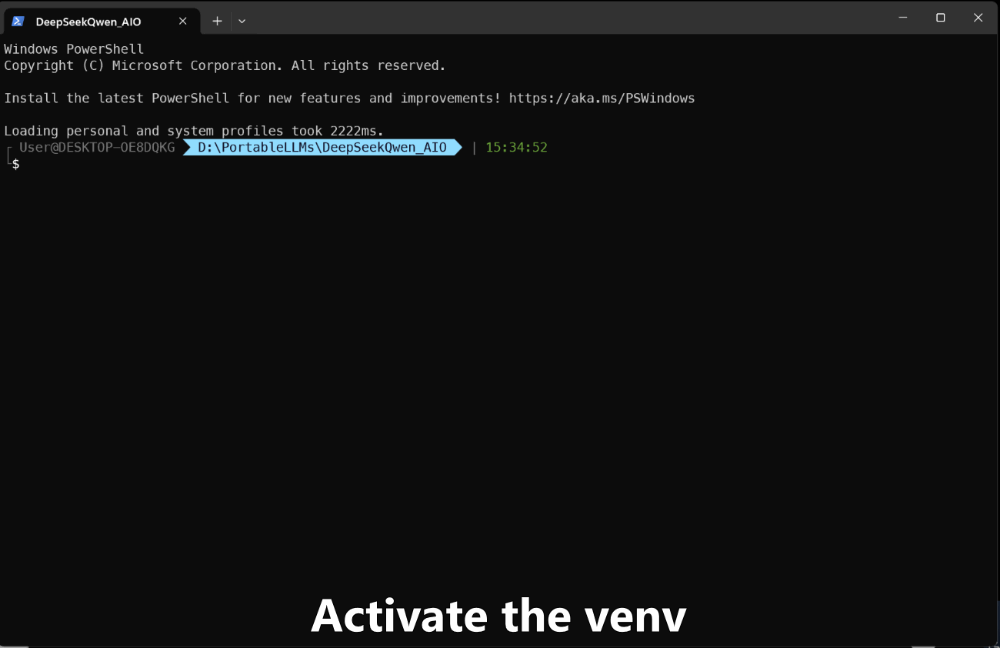
Create a virtual environment in a brand new folder: I called mine DeepSeekQwen_AIO.
python -m venv venv
venv\Script\activate
pip install openai
Now we need to download 2 files: the ZIP archive with the llama.cpp binaries, and the GGUF weights of DeepSeek-R1-Distill-Qwen-1.5B quantized:
Make sure that both of them are located in the main project directory (for me DeepSeekQwen_AIO )
Extract in the same directory the entire content of the llama.cpp ZIP archive.
Subprocess will run the server for you
The main difference from my previous tutorials, is that we will let python run the server before starting the chat interface. For this purpose we will use the subprocess library (no need to install it).
Let’s see the code, included in my python file runDeepSeekR1_all.py (download it and follow up the code explanations).
from openai import OpenAI
import sys
from time import sleep
import warnings
warnings.filterwarnings(action='ignore')
import subprocess

modelname = 'DeepSeek-R1-Distill-Qwen-1.5B'
NCTX = 131072
print(f"Starting llamacpp server for {modelname} Context length={NCTX} tokens...")
mc = ['start',
    'cmd.exe',
    '/k',
    'llama-server.exe',
    '-m',
    'DeepSeek-R1-Distill-Qwen-1.5B-Q6_K.gguf',
    '-c',
    '15000',
    '-ngl',
    '999'
]
res = subprocess.call(mc,shell=True)
As you can see, subprocess wants to have all the elements of a command string, transformed into a list of strings. In fact in the terminal we would have simply run:
llama-server.exe -m DeepSeek-R1-Distill-Qwen-1.5B-Q6_K.gguf -c 15000 -ngl 999Where
-nglsignals the number of layers we want to send to the GPU - It means that if you have a Vulkan driver it will automatically try to send to the VRAM of whatever your GPU that specific number of layers (999stands for all)
If you are going to use only your CPU, change the strings as -ngl 0
Note that even the numbers are treated as strings!

We add the parameter shell=True, so that python will interpret the command as a terminal app. And the good thing is that it will open a new terminal window to run the sub-process!
After the execution the llama-server with DeepSeek-R1-Distill-Qwen-1.5B will run on localhost at port 8080.
Now it is time to interact with the model.
The splash screen (sort of…)
STOPS = ['<´¢£endÔûüofÔûüsentence´¢£>']
COUNTERLIMITS = 10  #an even number


# ASCII ART FROM https://asciiart.club/
print("\033[94m")
t = """


     ,╓╗╗╗╗@╢`  ]╗²   ,
   ╓╢▒▒▒▒▒▒▒▒║╖  ║▒║╢▒║                                               ,
  ]▒╙╙╙╝╢▒▒▒▒╢╢▒╗╖╢▒`     ,╓ ║[ ,╓╖╓   ╓╖╖  ╓╖╓╖,  ,╓╖╖   ╓╓╖,  ,╓╖╓  ▒   ╓
  ]▒      ╙▒▒║[ ╢▒▒║     ╢`  ║[]╜ ╓╓╢ ╢ ╓╓║ ║╜  ╙║ ╢╖╓╓  ╢`╓╓║[]╝ ╓╓╢ ▒ ╖╜
   ╢╢       ╢▒▒▒▒▒╝      ╙╖²╓╢[ ║╖╓╖r ║╖╓╓m ║[┌╓╢┘ ╗╖,╓╢ ╙╗╓╓╗  ║╖╓╖r ▒  ║╖
    ╙▒╗, ╙@╖ ╙║▒▒▒                          ║[
      ╙╝║▒▒▒╢╝╜²`"`


                              ║║╢╢╢╢╢╢╢@╗ ,,╓╗╢╢╢[
                              ▒▒▒▒```║▒▒▒╢▒║╝║▒▒▒
                             ║▒▒▒▒║╢╢▒▒╢`    ▒▒▒[
                             ▒▒▒▒   ▒▒▒▒    ]▒▒▒
                             ````   ````    ````


"""
print(t)
This first part is more to prettify the terminal. The important variable here is the End Of Sequence token (EOS) that will tell the model when to stop the generation.
Remember that the GPT models are trained to generate statistically the most plausible next word. If not trained to stop, they will go on generating for ever. This training is usually done with the fine-tuning, where the model learn to stop at a specific magic word (the EOS token).
# Point to the local server
client = OpenAI(base_url="http://localhost:8080/v1", api_key="not-needed", organization=modelname)
print(f"✅ Ready to Chat with {modelname} Context length={NCTX} tokens...")
print("\033[0m")  #reset all

history = [
]
print("\033[92;1m") #escape codes to change colors
counter = 1
Now we point our API client to the server endpoint, and initialize the chat history. And the llama-server was started from the python app, just before.

The input section in the loop
while True:
    if counter > COUNTERLIMITS:
        history = [
        ]
    userinput = ""
    print("\033[1;30m")  #dark grey
    print("Enter your text (end input with Ctrl+D on Unix or Ctrl+Z on Windows) - type quit! to exit the chatroom:")
    print("\033[91;1m")  #red
    lines = sys.stdin.readlines()
    for line in lines:
        userinput += line + "\n"
    if "quit!" in lines[0].lower():
        print("\033[0mBYE BYE!")
        break
    history.append({"role": "user", "content": userinput})
    print("\033[92;1m")
Initially we set a limit for the chat history, in the COUTERLIMITS variable. Now we check every iteration if we are above 10 turns, and in that case we reset to 0 the chat history.
Note that there is a mistake here: tell me in Substack what it is 😉 if you find it! - The app will work anyway, so this is not a trick

The generation and output section
    completion = client.chat.completions.create(
        model="local-model", # this field is currently unused
        messages=history,
        temperature=0.3,
        frequency_penalty  = 1.6,
        max_tokens = 1000,
        stream=True,
        stop=STOPS
    )

    new_message = {"role": "assistant", "content": ""}

    for chunk in completion:
        if chunk.choices[0].delta.content:
            print(chunk.choices[0].delta.content, end="", flush=True)
            new_message["content"] += chunk.choices[0].delta.content
    history.append(new_message)
    counter += 1
Here two things are happening: we call the completion endpoint requesting to stream back to us the text as soon as it is generated (basically one token at the time); then we iterate over the response to print each single token whenever the server is giving it to us.
When it is completed we append the new message in the chat history
This is the final result… I hope you liked it!
Well, I think with this I fulfilled my promise, announced last week. Today as a gift I will leave for you an article that explores the pros and cons of having Big Pharma Companies pairing up with the Big Tech Giants in AI for our healthcare…

This is only the start!
Hope you will find all of this useful. I am using Substack only for the newsletter. Here every week I am giving free links to my paid articles on Medium. Follow me and Read my latest articles https://medium.com/@fabio.matricardi
Check out my Substack page, if you missed some posts. And, since it is free, feel free to share it!